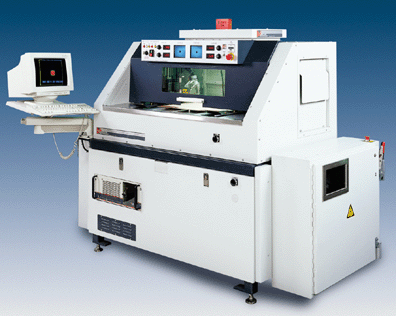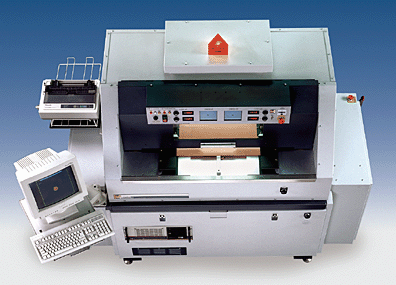
In the XRT 1000 Optiline PL every panel is x-rayed and new tooling holes are drilled based on each panel's individual registration characteristics. Any registration errors caused by material instability, or shifts during the lamination cycle are compensated by optimizing the location of the drilled tooling hole to the x-rayed target stack. The result of this process is better drill-to-pad registration through the panel, no program drill offsets, faster set up on the Drill, and increased throughput in the Drill Room. Drill down time for offset determination is virtually eliminated.
The XRT 1000 Optiline PL is designed for the small to medium size fabricators who desire the technology of the standard, fully automated Optiline PL, but do not need the material handling features. the same accuracy, ease of operation, and statistical data output is provided as with the standard Optiline PL. Although the panels are loaded and unloaded manually by the operator, through-puts of 150 to 200 panels per hour can be expected but may vary depending upon the operators proficiency.
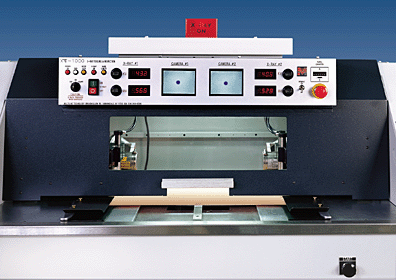
FEATURES Note: Since the accuracy using x-rays is difficult to quantify, accuracy and repeatability are confirmed by processing a panel with exposed targets front and back, drilling in the system, and measuring the actual location of the drilled hole to the target pads. OPERATION: The operator places a panel on the material platform, sliding it under a shielding curtain. Low-level x-ray is turned on to allow the operator to position the panel so that the x-ray targets come into the field of view of the cameras. This view is displayed in two LCD monitors located in the top of the cabinet. Once the targets are in view, an operator start command is initiated and the system automatically positions the panel to align the target stack, splits any error, and drills tooling holes for the Drill.
At the completion of the drill cycle, the operator removes the panel and loads the next one.
LAYER ANALYSIS PACKAGE (LAP) Unlike other measuring techniques currently available for layer analysis of laminated panels, X-Ray is non-destructive and can be performed during the normal progression of the panel through the process steps. In some of the other methods of internal layer analysis the panel must be drilled before it can be checked. This not only requires another step but adds the drill tolerance to the measuring accuracy.
The XRT 1000 Optiline PL with the layer analysis package has the capability to calculate spreads (material growth or shrinkage) for both X and Y axis for each individual layer in a laminated multilayer printed circuit board. In addition to the common targets used for drilling, a set of targets specific to every layer is imaged and etched on the innerlayers. To use the LAP, the operator places the panel in the machine and selects TEST MODE. The panel is aligned and nulled to the common target stack. The operator can then select which layers to have the machine measure. Up to nine target pairs can be selected. If targets are placed on both the X and Y axis then the panel can be rotated and placed back in the machine. The X-Ray cameras automatically move to the "Y" dimension and the machine automatically goes through the same routine as was performed in the "X" axis.
In only a few minutes, information is obtained on the actual growth or shrinkage of each innerlayer.
The data is collected for all the layers measured and a prinout is provided which includes the following statistical data: SPECIFICATIONS
Minimum Panel Thickness:
Maximum Panel Thickness:
Tooling Hole Size:
Drill Position Accuracy:
Drill Position Repeatability:
Image to Drill Accuracy:
X-Y-Theta Deck Resolution:
X-ray Source Voltage:
System Power:
Pneumatic Requirements:
System Weight: Contact Multiline for your specific needs by E-mail to sales@multiline.com or fill out the Literature Request Form.. Home | About Us | Staff | Directions | Literature | News | Products | Employment | Contact Us
© 1999 Multiline Technology
|


